This powerful plugin simply allows you to redirect your customers to another WooCommerce site of your own to make the payment through any of the payment methods installed there (on the other site). So for example if you have a WooCommerce site called "WebsiteA.com" offering goods/services that is considered high risk business you will be able to redirect your customers at the last step of checkout to "WebsiteB.com" which offers goods/services that is considered low risk. By this method you will be able accept payments for any WooCommerce website without having to get approved as you will already use a preapproved WooCommerce website of your own to accept customer payments through checkout redirection.
For the purpose of illustration we will name our two example sites as follow
- "websiteA.com" this is our high risk business that we want to sell items to customers and redirect them during checkout to make the payment on another site.
- "websiteB.com" this is our low risk business already approved by payment gateways such as PayPal or Stripe. We will redirect customers during checkout here to make the payment.
Installation
- After purchasing this plugin you will get a zip file extract it once to get the plugin zip packages

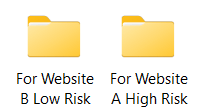
- The two folders you get from the extraction contain each plugin zip file for each website you own. The plugin is two parts that you need to install carefully for each of your WooCommerce websites.
- "woocommerce-rest-a.zip" will be installed on the High Risk business site in our example WebsiteA.com
- "woocommerce-rest-b.zip" will be installed on the low risk business site in our example it is Websiteb.com
- Zip files for each site can be installed easily from your wordpress /wp-admin


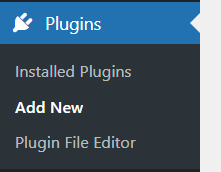
- You simply click "Add New" then from the top "Upload Plugin" then choose the zip file from your device

Plugin Configuration
It is very easy to setup the plugin on your two websites or in case you want to redirect payments from multiple high risk websites to one low risk website accepting payments. All you have to do is to install both plugin parts on its respective website per instruction above then insert the low risk (Website B) URL in the HighRiskShop.COM gateway settings under wp-admin of website A. Follow instructions below:
Website A (High Risk Business)
- Go to Website A /wp-admin
- WooCommerce » Settings
- In the Payments tab edit HighRiskShop.com gateway settings
- Insert the low risk (Website B) home page URL.

Website B (Low Risk Business)
- For Website B low risk configuration you don't need to change any settings just install and activate the plugin.
- You don't need to change any settings after activation. Just make sure the plugin directory can be accessed through your firewall for the redirect to work.
Managing Orders
If you want to refund orders or mark your orders as complete you should do this from Website B or the payment gateway dashboard such as (PayPal - Stripe) as the plugin will automatically change related orders status of Website A via the API.
Important Settings & Prerequisites
There are some settings you need to change to get the plugin working correctly.
- You need to have at least one active product that can be added to cart on your low risk (website B).
- Disable blocks on the Checkout page.
- Enable "Wordpress Posts Storage (Legacy) by visiting /wp-admin/admin.php?page=wc-settings&tab=advanced§ion=features

Version Updates
We may release updated versions from time to time. You can check how to get them at the updated versions page.
